Tuesday, 5 February 2013

Female Samaritans - Assembly

There are two different female bodies included in bag 4 - one wearing a helmet and one with a bare head. The bare headed version is designed to take the las carbine, and the helmeted version is primarily designed to take the special weapons, though it will also take the las carbine perfectly well. I have found it's easy to make the guns fit any of the miniatures with just a little trimming to the right shoulder, and in some cases a tiny re-positioning of the left arm with hot water (method here).

The special weapons for these miniatures are found in bag 3, on the sprues that also contain the Reaver arm and weapon.

Each miniature comes in two pieces - the body and the weapon. Here are all the parts together - including the weapons still on the sprues.


Before I assembled any of the miniatures, I dry fitted the parts I was working with to check the fit. If there needed to be any adjustment of the left arm, I did that first and then glued the pieces. The las Carbine fitted very well on the body with bare head, and the Lancer special weapon fitted well on the helmet body.


The other weapon combinations go together in exactly the same way - here's the body with no helmet assembled as a Grenadier.


Thursday, 31 January 2013

Male Samaritan - Assembly

Here are the assembly instructions for the male Samaritan trooper.

This is just a two piece miniature - body, and arm/gun -


And here is how he goes together -


It's a nice close fit between the gun and the body, so they assemble very easily.

Here's a couple of pictures of the fit between the gun and the body -


Tuesday, 29 January 2013

Revenants - Assembly

There are three different variants of the Strain phase 1 Revenant, and all are very easy to assemble. Two of them only require attaching to the base, and the other just needs the two halves of the body joining.

Here are the parts of the three variants -


The two single piece miniatures just require attaching to the base -


The other Revenant just need the two halves gluing together. It's best to attach the feet to the base first - that allows you to get a good contact between the two halves of the body and the left hand which is touching the base -


Thursday, 24 January 2013

Cthonian - Assembly

The miniature that has caused the most problems for assembly so far is the Grendlr - with the two parts of the body being warped so they do not fit correctly. I shot a video for how to handle that issue, and we found it worked very effectively. There is a similar issue with the Cthonian - but it's just one of the legs that has warped, causing problems with the way it fits on the base. Again, this was pretty simple to fix - I just dipped it in very hot water (being careful), and re-shaped it slightly.

I found the best way to do this was to attach the left leg first (as that fit correctly), and then correct the position of the right leg, lining it up by standing the miniature on it's feet while the leg cools.

The other thing I did on this one, was to pin the arms into place - this is not strictly necessary, but where there is a large part attaching to a small area, the increased leverage make it quite likely to break off if dropped. I just drilled a hole in the end of the rounded part of the joint - glued a short length of brass wire in place (a little bit of paper clip would do just as well), and then drill a corresponding hole in the gun. The two parts are then glued together. There is one part that is optional - the face plate. If you want to add that, it just attaches to the front of the head.

Here are the parts for the Cthonian -


Here is the fit between the right leg and the ground before it is fixed, the left leg is glued in place here -


Here is the fit after the right leg has been dipped in hot water and held against the ground while it dries, and is then glued to the base -


To pin the arms in place, I drilled a hole in the body half, then inserted a short brass pin -


Then the arm was glued in place, and I did the same for the opposite side -


Here is how the optional face-plate fits -


Wednesday, 23 January 2013

Brimstone - Assembly

Here are the assembly instructions for the other Phase three Strain in the game - the Brimstone. The parts go together very easily for this one - there are definite locations for each of the limbs. I found it easiest to attach three of the limbs first - making sure the contact with the ground was level while the glue was drying. It should be fine though as the fittings are accurate. When the first three limbs were on - I glued it to the base, then added the final leg.

Here are the components -


And here is the stage by stage assembly -


BfA - Bag 4 contents

Here are the contents of bag 4 -


This one contains the following -

Five male Samaritans (complete with guns), five female Samaritans with helmet, five female Samaritans with no helmet, five phase one with claw hand, five phase one with big arm, four phase one crouched over, four phase two Quasimodo, four phase two Stalker.

The guns for the female Samaritans are found in bag 2

mike

Scythe Witch - Assembly

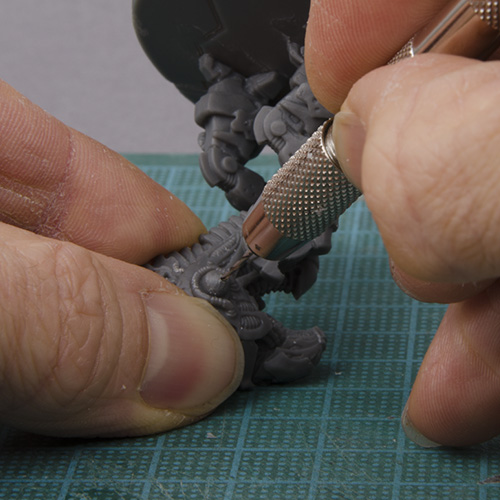
Here are the instructions for the Scythe Witch, one of the phase three Strain from bag 2. The only separate part on this miniature is the right arm - which glues on pretty easily at the shoulder. There is no plug and socket joint, but the parts fit accurately together in the correct position. There is one trickly little injection mark to remove on the tendril - the best way to et this is to hold the part flat against a solid surface (ideally a cutting mat, or piece of thick card), and carefully trim it away with a sharp blade.

Here are the two parts -


Here is the injection mark being removed -


And here's how the parts go together -